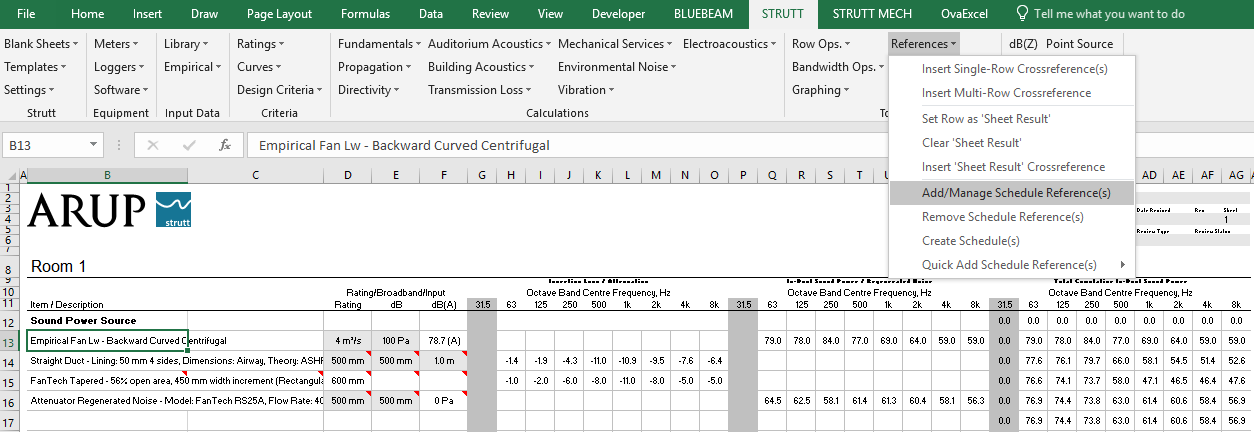
Figure 1: Accessing the scheduling dialog box

The Scheduling feature in Strutt provides an easy way of creating schedules of equipment. The schedule will be compiled from equipment data on all Strutt sheets in the workbook. In the example below, it is in a Mechanical sheet.
Go to Tools → References → Add/Manage Schedule Reference(s) (Figure 1).
A dialog box will open from which you can select the reference category (attenuator, Fan, AHU, etc.) and the reference type (attenuator insertion loss or attenuator regen noise, supply air fan, return air fan, etc.). In Figure 2 below, the row containing the attenuator insertion loss values is labelled with "ATT-01" in column A when the insert button is clicked.
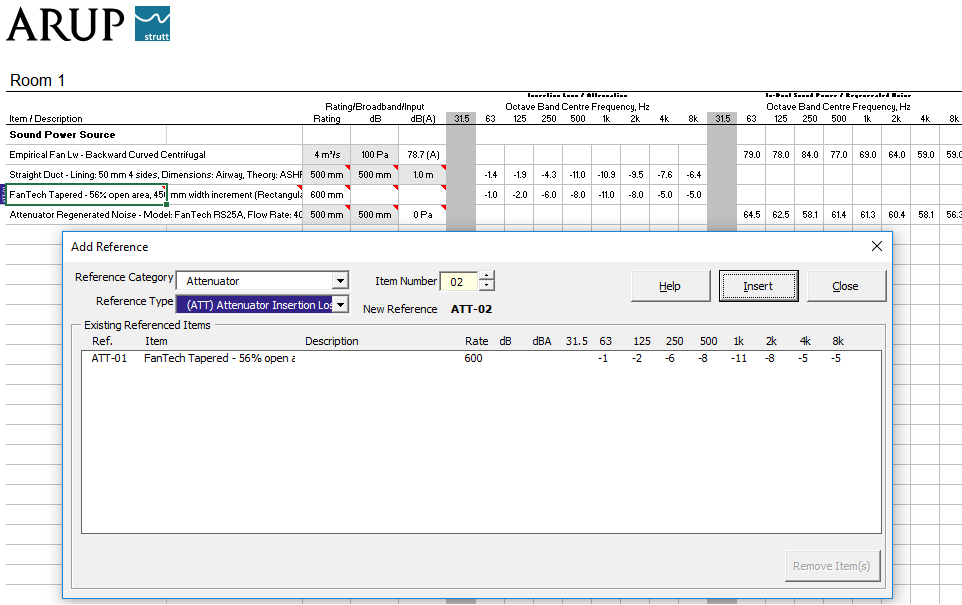
The attenuator regenerated noise and the fan noise levels can be labelled in the same way, by selecting the relevant reference category and type, selecting the row containing the noise data and clicking the Insert button.
In order to create a schedule of equipment, go to Tools → References → Create Schedule(s). The schedule for each category of equipment is created on a separate page (Figure 3).
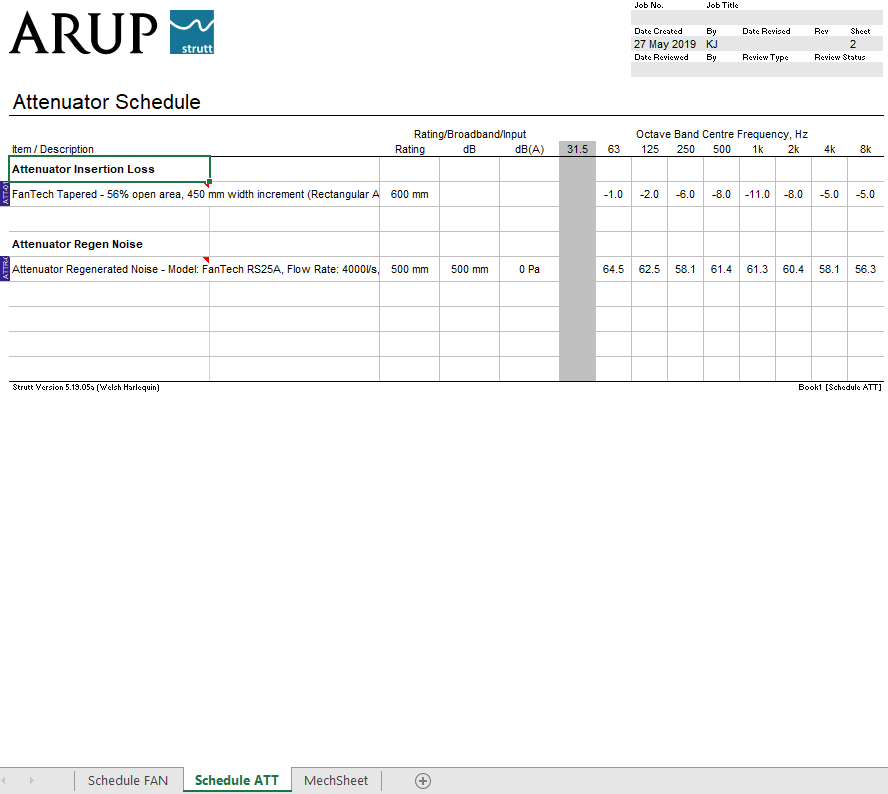
The schedules are in numerical order. This makes it very easy to, for example, manually create a table of attenuators with insertion losses and corresposnding regenerated noise levels in the same row.
A schedule reference can be removed from the current row via Tools → References → Remove Reference(s).
Tools → References → Quick Add Schedule Reference(s) can be used to quick-add a schedule reference to a row from a drop-down list.
Happy Strutting!